Wednesday, August 24, 2011

alley art

A couple weeks ago I found this painting in my boyfriends alley. Sure, it's not the most attractive painting ever, but I was loving the frame. It looks and feels rich to me. So I grabbed it and put it in my work dungeon. Well I finally had time to re-do it and this is what I came up with.


I painting it all white and kept it simple with peace & heart graphics. It was strictly black and white, but it was Mike's idea to fill in the heart with spray paint to give that cool effect.
He also contributed the perfect name: "My heart bleeds for peace".

*Post Update*
I was just informed this is the Mercedes logo....whoops!
I'll fix it and repost soon ;) 

kitchen decor

I thought I would post some of the pictures I took of the whole desk process seen here

 Since I don't own saw horses (yet) I cut the desktop on some stools. I really don't recommend this, don't do it kids! It was hard, and I really had to hold down the wood to make sure it didn't fly and kill Mike.


Us posing happily with the new bare countertop :)

And now for the after pictures!!!

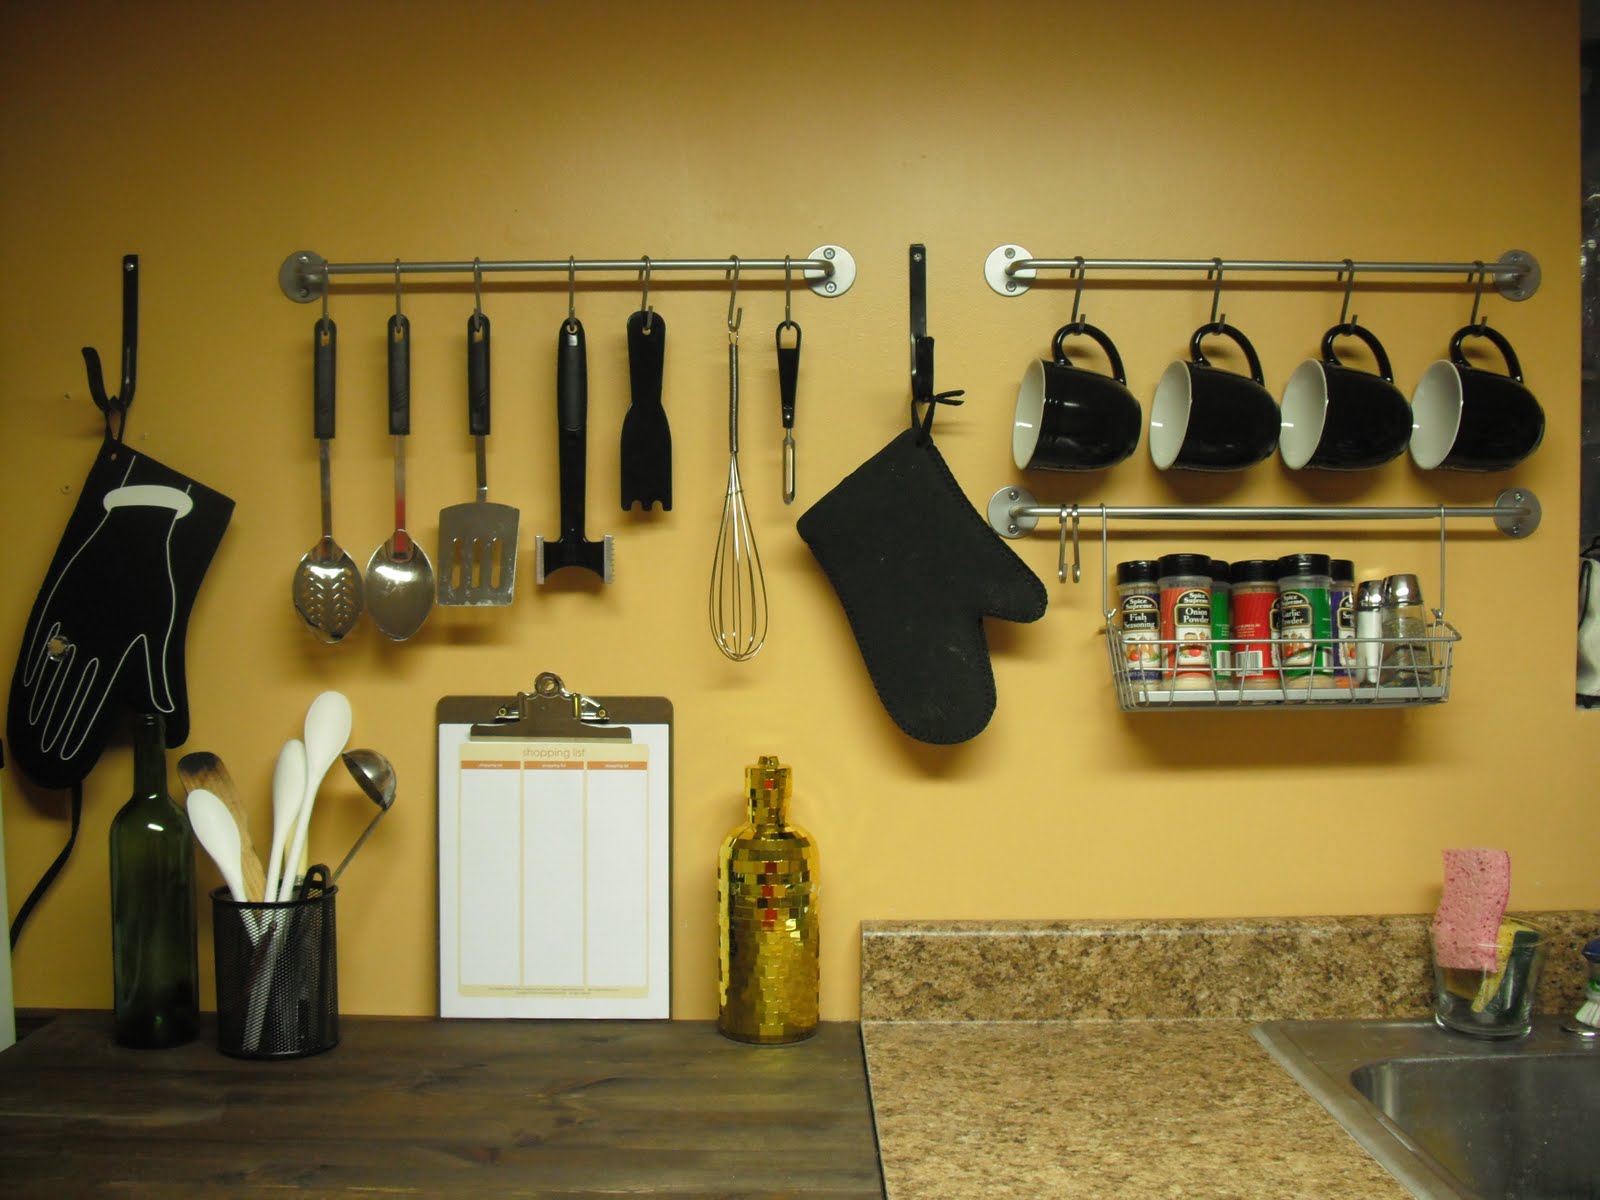
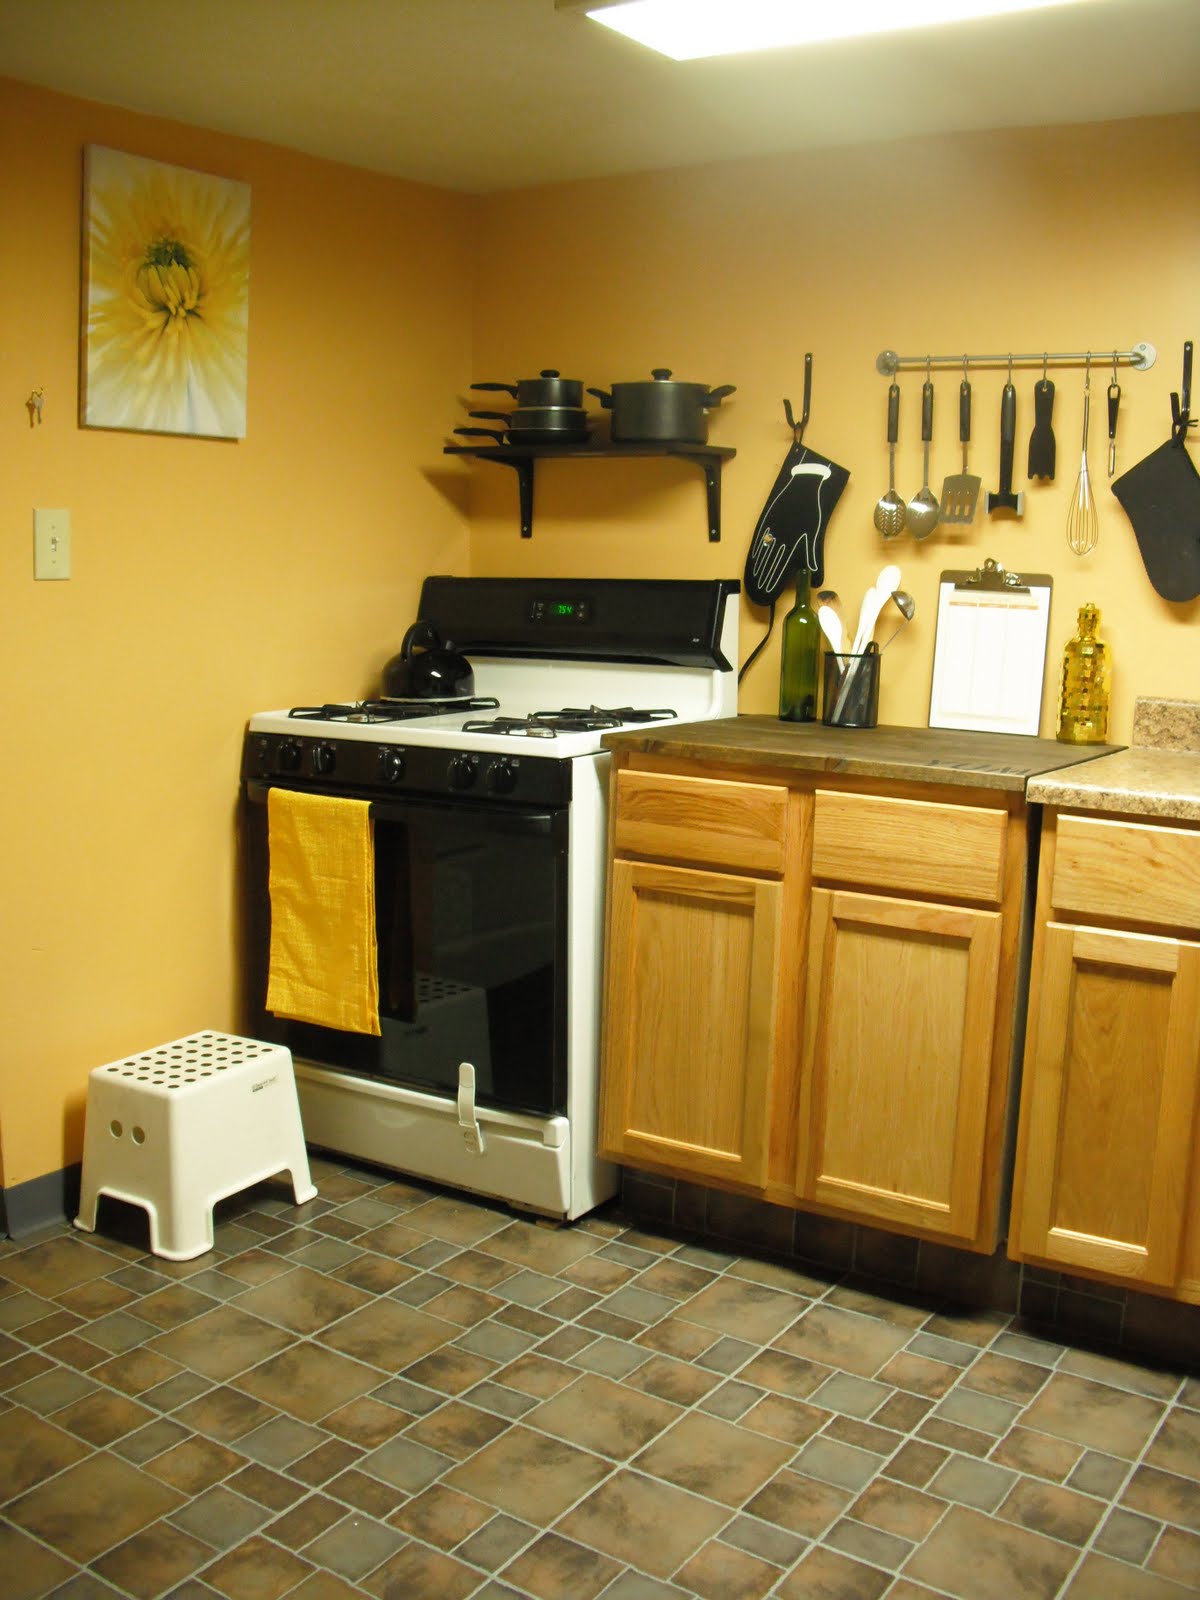
I added a Bygel rail to hang my cooking utensils, switched out my light bookshelf for a darker one to match the counter top and hung my adorable oven mitt.


Now it will be easier to cook, if I ever decide to ;)


I found this shopping list, and it matches the kitchen perfectly.


Mike bought me this oven mitt. I think he's trying to tell me something :D

Thanks for taking a tour of my kitchen!

breast cancer t-shirt design

This is another quick little graphic design update. I was hired by one of my good friends to design a t-shirt for her breast cancer fundraiser bar crawl. I happily accepted and came up with this little design.

(Erica & I)

I design stuff all the time, but this is the 1st time (well 2nd time if you count the t-shirt art contest in high school) that something has been made into an actual shirt. It felt awesome seeing everyone in their pink shirts. I'll never forget that feeling :)


butcher block counter top love


Back on June 22nd when I was feeling all sorts of optimistic I made a to-do  list…to do. Unfortunately, I didn’t really finish it.  My boyfriend’s bedroom is still in limbo. He still has paper work everywhere and that hideous thing of a desk in there. I won’t touch it until he fixes that problem lol. My 2nd bedroom turned closet/office is pretty much done. I painted the wall black, cleaned it up and fixed my art corner. I should probably take some pictures of it, huh?
I didn’t turn my coffee table into a bench, I tried to sell it in a garage sale but to my surprise no one took it. It doesn’t have 1 scratch on it; I really thought it was going to be one of the first things I sold. I also didn’t paint my paint can planters.  *sigh*

BUT I did get to do something else that wasn’t even on my list.
1. I painted the concrete exterior blocks in the front. Nice and white, looks nice and brighter. I still have some parts to finish…I think I’ll do it on the weekend.
2. I added another cabinet to my kitchen. I had a gap there before and had a wire bookcase holding my plates (pics seen here). I never really liked how it looked, but I stayed with that for so long because 1. I didn’t want to buy another cabinet 2. I didn’t know how to install another cabinet.

But guess what? My bestie for life, Jennifer gave me a $50 gift card to my favorite store Lowes, so I used it towards the purchase. It actually looks and feels like a complete kitchen now.
Everything was fine and dandy until I realized that the cabinets didn’t match up. My kitchen floor is 100% uneven so that’s how my cabinets were going to be.  Yes, my heart ached for a minute or so, but then I thought, “who cares?” Who cares if my cabinets aren’t completely straight?? I don’t, just as long as I have something there right?

I painted my unfinished cabinet to match its counterpart and it looks lovely. But once again, I ran into a bump on the road. The base cabinet is only 30 inches wide, and the countertop I needed doesn’t sell that size. They don’t even sell anything close to it!  But as usual Ikea saved the day.  Instead of having the same countertop, why not add some butcher block?

I know what you’re thinking, “why is she mixing tops?” but I know it will work! Last Sunday I helped out at an Open House for a million dollar home. The homeowner had a butcher-block countertop next to her oven where she said it was easier to prepare meals. That way, she didn’t have to ruin her granite countertops. It’s genius if you think about it.

I found LAGAN at Ikea, it’s the very cheap version of their butcher block, and at $39 it’s the perfect price for me :). The best part is, it can be cut and sanded down. It’s like music to my ears.
Well I went to lowes to buy the butcher block and guess what? They were SOLD OUT of it!  I was heartbroken until my shopping angel boyfriend spotted out a pine wooden desktop. It was $40 and beautiful. I took it in a heart beat!

I went home, cut it down with my boo (which was quite the experience). Side note: NEVER saw anything indoors, the dust literally took over my entire apartment and it took a couple hours to get the woodshop class smell out of it. Blah! But I learned better and decided to stain the block outside. Yes, I stained it a beautiful dark walnut brown. It’s gorgeoussss! !

I brought it inside, set it up and you know what? I like it. It looks funky at first but then you warm up to it. Plus I’ve never been one to be cookie cutter so what would you expect from me? ;)  

Full beautiful pics will be up soon.  Until then, look at my awesome cell phone pictures :P


It's fits! Well, kinda :P


I had a whoopsie while sawing, but this wood filler is AWESOME! 


I thought I would add in a little detail.


Hey, it's better than what I had before! ;)

Saturday, June 25, 2011

rosette pillow tutorial


I’ve never been able to spend more than $10 on a throw pillow. Call me crazy, but spending anything over $10 for something that is going to get squished and tossed around all the time just doesn’t seem right to me. Plus, throw pillows have always been ugly to me, same old boring colors and patterns 
until I saw this.


This rosette pillow is absolutely GORGEOUS! The color, style and texture of this pillow was lovely, but the price was ridiculous! I was/am not paying $25 for 1 pillow! I technically would have to spend $50 in total because, who only buys 1 pillow?

Needless to say, I was just not feeling that price. =/

Months went by and every time I would go to Target, I would find myself wandering into the furniture department looking for that beautiful pillow. It was always there, waiting for me like mans best friend…but I still didn’t want to spend the mula. So I left Target every single time with a little less of my soul. (Yes, I’m dramatic lol)

So I thought and I thought and said WHY DON’T I JUST MAKE ONE?!? And so I did. :)

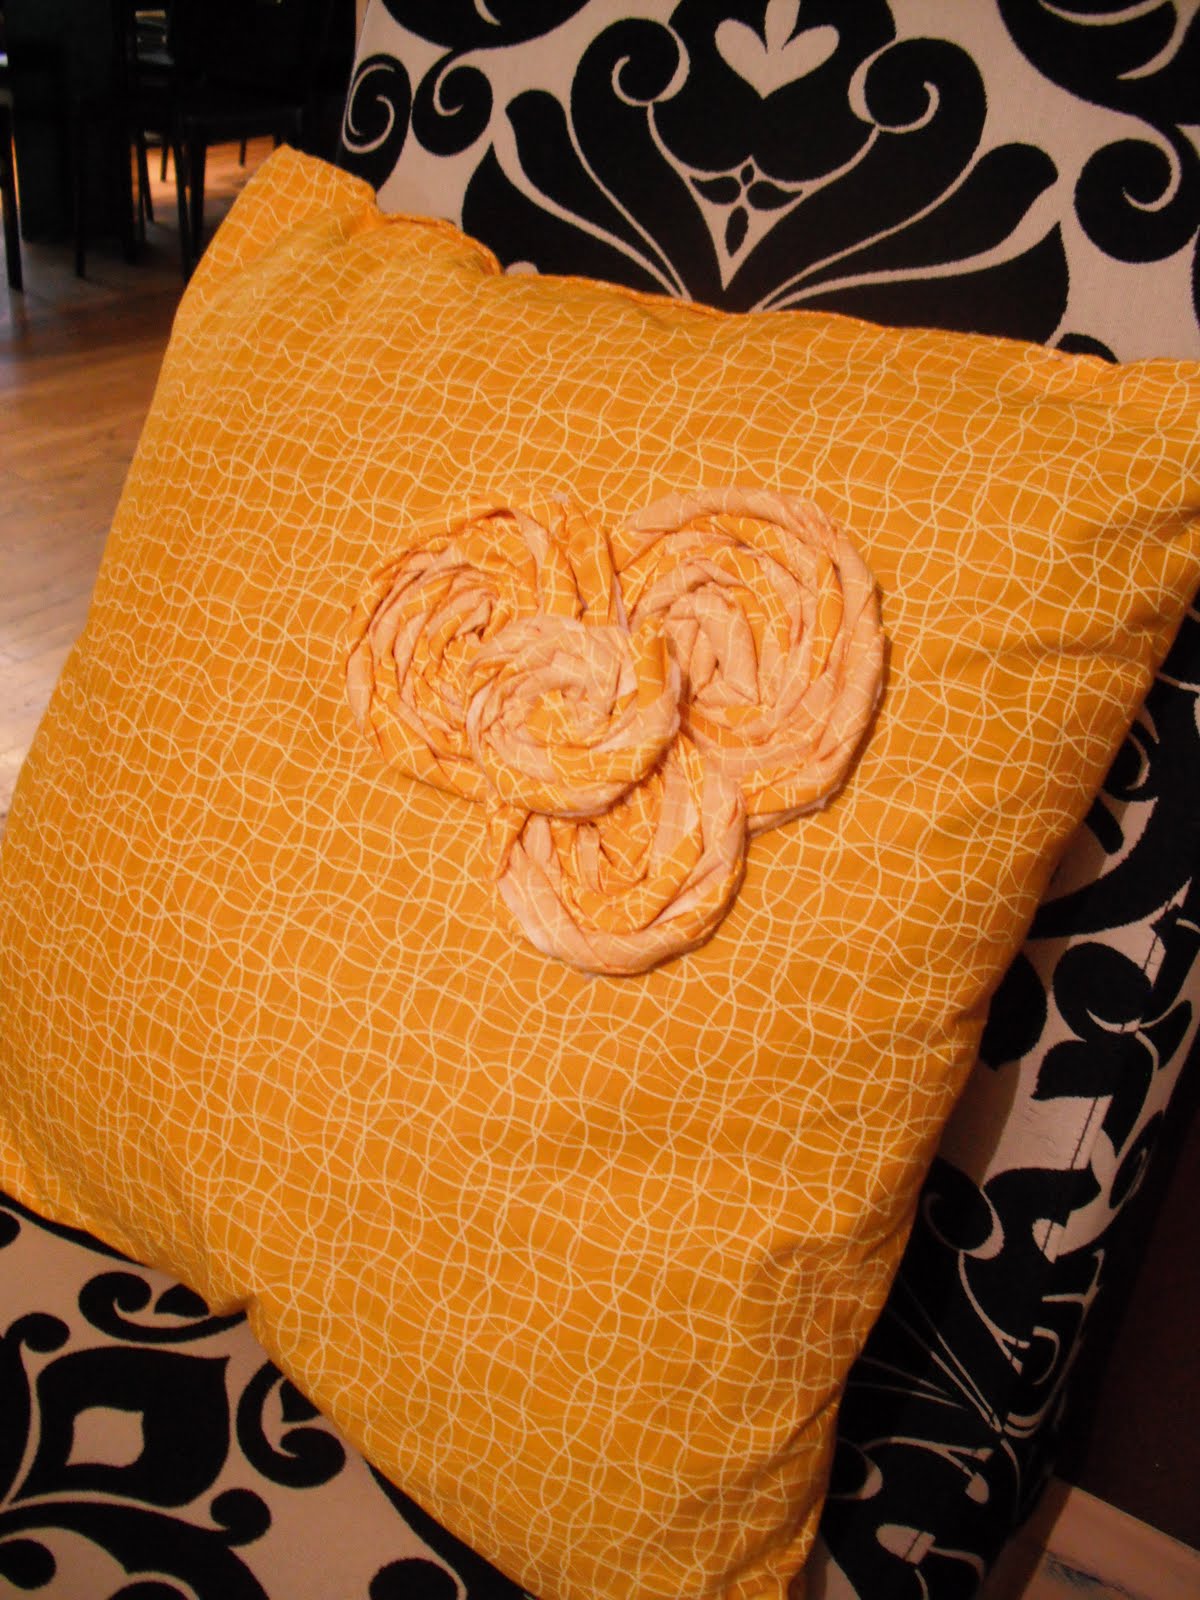
When I first bought my couch it came with 2 standard pillows. The design was not my style so I made pillowcases out of that yellow material I seem to use in every project lol. The pillows stayed plain for 10 months until I got the idea to add little rosettes to them. 


The first thing I did was cut strips of yellow material. I did 6” long by 2” wide and added a drop of hot glue on some felt. I attached the yellow material and twirled it into a flower shape. I kept adding hot glue as I went to hold it down and kept twirling until I ran out of material. I let it set for a few minutes, then cut the flower from the felt. I did this 7 or 8 times and added them to the pillows.


I felt like there was way too much yellow, so I took an old white t-shirt and did the same thing. Now my pillows have yellow and white flowers.


Now I love them.... and the best part is it was FREE :)

Wednesday, June 22, 2011

i never finish anyth

Do you ever feel like your brain is going at 100 mph? That’s how I feel all the freakin’ time, seriously. I just have so many ideas and not enough hours in the day (and money in the bank, haha) to do them all. Looking back at my blog, I’ve noticed that I leave a lot of my projects un-finished. For instance, my refrigerator...I was supposed to have a chalkboard surface refrigerator but ended up dumping that idea to cover it in black contact paper. That tiny change made the biggest difference ever! People think we bought a new fridge! I never finished re-shooting the kitchen, I gotta get on that to show you just how amazing it looks now.

My boyfriend’s bedroom, but this one is not my fault. He has yet to clean out his million shoe boxes full of junk paper. I refuse to do anything in that bedroom until that situation is taken care of. But really all we have to do is hang picture frames back up and throw out that hideous desk. I asked him if he wanted me to paint his dressers with some cool design but I didn’t get a definite yes or no on that one. Sooo stay tuned for that project to be finished.

I recently started to mess around with my 2nd bedroom turned closet/office. I realized after I graduated that I never used my “office”. So, to get more out of my closet I took out the desk and moved in this purple kitchen cabinet-turned bookcase that you can see here holding up my tv and use it as my craft station instead. I re-used the whole black and white scheme that I did in my kitchen and painted one wall black. I’m trying to go for a glamorous/forever21 vibe with this closet and so far so good. But I still want to add a faux roman shade, get a sheepskin rug and somehow fit this chair into the mix. Pictures will be up soon (I hope haha)

But now that’s its summer, I want to leave these projects in limbo and throw myself into updating the front porch, backyard deck, and my back entryway. Once again I have 801,164,126 ideas that I hope to get done before summer is over.

Here’s my list.

1. Turn my lack coffee table into an outdoor bench.

When I moved this table out of the way to lay down tiles, I really loved the open feel it gave my living room. So I said “so long” to my table and kept it in my closet for months. I didn’t want to throw it out though, it’s still brand new looking thanks to me being extremely anal and making people use coasters and placemats lol, but no one wanted it either. I moved it into my kitchen when I started re-doing my closet and happened to sit down on it. It’s extremely sturdy, and so a light bulb went off giving me the idea to make it into a bench. But it wasn’t until I started thinking about the front porch when I got the idea to make an outdoor seating area and put it there. I do have to buy some sealer and paint it to make sure I don’t get water damage. But there’s idea #1.

2. Paint my back door black.

Yes, I wanted it red before, like my front door but I didn’t think it would match my awesome security door. I’ll pick up some black exterior paint soon.

3. Paint can planters.

I saw this on another blog and it looks AWESOME, plus with all the paint jobs I do I have plentyyyyyyyyyyy of empty paint cans.

That’s all I can think of for now, until then I’m thinking this should be my slogan.


P.S. DON'T FORGET TO FOLLOW ME!

Please? :)

Tuesday, June 14, 2011

ribbon wedding bouquet

I just loveeee weddings!

Sorry I haven’t been blogging but I’ve been super busy in my friends wedding. She’s actually getting married this Saturday so I thought I would fit one little post in my crazy schedule.

Last month she had a Surprise Bridal Shower where she received a zillion gifts. The room was drowning in gift-wrap and purple ribbons…I mean, it was everywhere! So the bridesmaids grabbed all the ribbons and kept them on the side. I took them home and made a ribbon bouquet for her to hold on her Wedding Rehearsal day, which was today.

[All the ribbons]


I went to Michaels (of course) and bought a foam ball and flower tape. I made the ribbons in the shape of flowers and glued them to the ball. 

You can see that I not only used the purple ribbons but also the big gift bows too. I then took the stem part off another fake bouquet, bent it in half and stuck that into the foam ball and taped it with the flower tape to stay secure. For the “leaf” parts I used the curly ribbons to finish it off.


She finally got to hold it today, and she looked great with it ;)